Showing posts with label Regimen. Show all posts

Friday, March 2, 2012

Quick Update: Twist Stretching and Gel Nails


Ladies!

It has been a while since my last post, so I wanted to drop in to catch up. A lot of changes at work and at home have had me stretched thin lately. There hasn't been much time to experiement with my hair or new products :( I am in deperate need of a color touch up, and my nails were looking beyond tragic.

So last weekend I was basically dragged to the nail salon for a mani/pedi. Apparently my guy likes nails to be presentable, so he footed the bill, and I splurged on a gel manicure. The brand is Perfect Match and I forget the color, but it's like a mauve, I think. Gel polish is cured with the UV light dryer and dries to a perfect finish. The results are supposed to last for 2 weeks without chipping. I was a total skeptic, but it is holding up very well!! I'm almost a week in without a single chip! It kinds reminds me of acrylic tips without the drilling, which is great. As cheap as I am, I may have to keep this up. Here are my nails, 3 days later. Still perfect :)


As for my hair, I took some time to twist over the weekend, so my hair would match my lovely nails. I tried a stretching technique that I learned watching Naptural85 on YouTube. You basically twist damp hair, pull each twist around your head and pin it down. Once dry, you have a lot less shrinkage. This method worked very well, so I suggest you ladies try it out.


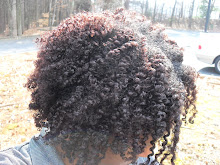
At night, leave the crown out to dry...


Here are the results the next morning. My twists are usually half as long with shrinkage...


As for products, here's a list of what's working for me now:

Shampoo: Suave Coconut to clarify
Shampoo: Shea Moisture's Moisture Retention

Co-wash: Aussie Moist Conditioner

Leave-in: Organix Passionfruit Guava Conditioner mixed with EVOO

Twisting: Shea Moisture's Curl Enhancing Smoothie

Edges: EcoStyler Gel w/ Argan Oil


*Smooches*

Queenofthe4's

Tuesday, December 21, 2010

Wet Styling- Mini Pineapples

Hola Chicas!

It's been a while since my last post...crazy how time has flown. I was in the process of moving this month, so things have been really hectic trying to get my furniture out of storage, etc. Some really weird things happened that I just won't even go into b/c I am hoping that it was a one time occurrence, and I don't have a creepy neighbor to look out for.

But since I have been gone, I haven't had time to try much of anything new with my 'do. The only thing that I am doing differently now is allowing my hair to dry in mini-pineapples. I first read about this on CurlyNikki, and the blogger was showing us how to preserve dry styles on short hair with this method. People with longer hair can pull their hair up into one high pony (hence the pineapple name) but other's with shorter hair or tighter curl patterns have to make smaller sections.

To do this, I follow my same co-wash routine and apply leave-in conditioner mixed with olive oil to damp hair. I finger detangle each section, pulling the oil mix through to the ends, and loosely band with an ouch-less band. By loosely, I mean no more than twice around. You don't want them to be too tight, and leave a huge bend in your hair once dry. Sleep with the puffs out on silk pillow case. Your hair should be mostly dry by morning.

The next morning, remove each band slowly so you don't get tangles. Wet your hands and fluff each section, hiding the parts (which really aren't parts, since I part with my fingers...easier to cover them that way). To define my edges, I smooth them with a little EcoStlyer gel and use bobby pins to make my hair fall to either side, framing my face.

The end result is hair that is dry for the colder weather, fuller, with more curl definition/elongated curls. I've tried to make this last with the dry mini-pineapples, and that works for the first night. By day three it's pretty much shot to the curb.

Hope you ladies have a wonderful Holiday Season and get to spend it with the ones you love most.

Smooches!

Natasha


Monday, November 8, 2010

Egg Protein Deep Conditioning

Step One: Crack and beat two raw eggs in a small bowl or measuring cup with a pouring spout. Pour the eggs into an applicator bottle.


Step Two: Part your hair into four sections and apply the egg mix directly to your hair and scalps. I apply at the scalp and pull it through to the ends; this keeps me from using too much on one section and running out too soon :)


Step Three: Make sure you have towels on hand to catch the drippies...there WILL be drippies...tons of them. This is normal but very annoying. You can sit under heat or let your hair air dry. As it dries, your hair will harden. Don't pull or mess with it in this state as this can lead to breakage.

Step Four: Rinse using cool water so that the egg will not cook in your hair. It's normal to have some egg-white flecks left behind, but I can usually pick them right out. Follow up with a moisturizing conditioning session, rinse, detangle, and you are good to go! Your hair should feel immediately stronger and your curls should have more spring to them. I do this immediately before and after straightening my hair to preserve my curl pattern from heat damage.


Wednesday, October 20, 2010

Catch 22: Suave Professionals Conditioner Review


Let me first say this: What does or doesn't work for me may absolutely work for you! Take this review with a grain of salt and try these products for yourself before you write them off as hopeless. Now, on to the review....


So I thought that I'd found my staple cheapie co-wash conditioner in the Suave Professionals line. They have several conditioners to choose from and at about $3.00 for 30somthing ounces, I almost bought 5 bottles at one time. Over the course of about 3 months I did try out two, the Humectant (compared to Nexxus Humectress) and the Shea and Almond (compared to Aveda). Hands down, the Humectant was WAY better than the Shea and Almond for providing moisture, slip, and having the consistency that I prefer in a co-wash conditioner. I used them both religiously...almost everyday for co-washing, leave-in, baggying....you name it, I was using it!! I really loved what they did for my hair. What I didn't know was that they were simultaneously wreaking havoc elsewhere....Let me back up and explain...


So back in August, I bought my first bottle of the conditioner. August 6th to be exact. About a week later, I saw my sister who immediately stated: "Is everything ok?? You're skin doesn't look as clear as usual..." Hmmmm..I didn't really notice it, but once she said it I couldn't deny it. I looked somewhat like a pre-teen with the breakouts I had going on on both sides of my face and hairline. Initially, I thought it was stress, poor diet, or lack of water causing the adult acne I was experiencing. I kicked up the nutrition (even bought multi-vitamins) and switched back to my college facial system: Clinique. Another sister, who is all medical and stuff, was pushing me to get my thyroid tested. None of us could pin point exactly what was causing the breakouts.


It took me a while to figure out what was going on. I first noticed that my skin would clear up when I was away from home for extended periods of time. So I started washing my pillow cases, and being careful with lotions I used at the house. That didn't help. Clinique didn't help. I was about ready to pull my hair out with frustration. I had a series of weddings and events to look good for and my face was acting a dayum fool! At one point, I looked like I'd been shot in the forehead...it was that bad! LOL!


Then, in October, I bought the two bottles of Giovanni conditioner previously mentioned. It took me a while to notice, but I haven't had a breakout since I've been using them. Everything else in my regimen remained the same, but once the Suave Professionals conditioner left the picture my skin cleared right up. All I can say is that I feel SO relieved. As much as I loved the Suave Professionals line for my hair, I can't sacrifice my sanity for the sake of saving a few bucks on cheap conditioner. Now I am just focused on getting rid of the scarring, and the Clinique system is wonderful at that.


It just goes to show that when switching to a new product, you have to pay attention to EVERYTHING that it does (or doesn't) do for you. Naturals can tend to have issues with breakouts because a lot of the products we use contain oils and other ingredients that can be pore clogging. As soon as you notice a change in your skin, try to tie it back to a recent product addition, then use the process of elimination to find the culprit and get rid of it!


RIP Suave Professionals Conditioner line...I'll pour out some Giovanni for ya... ;)

Wednesday, September 29, 2010

Curl Preservation and Conditioning: The "Baggy" Method

As a natural, two of the hardest things to maintain are our hair's moisture level and curl formation from day to day. For some dry hair is a serious problem that can result in crispity, lifeless curls.


I've found that the best way to stave off a case of the crispies is to invest in one of the cheapest beauty items out there: the disposable plastic shower cap. I originally bought a pack of 20 to use in conjunction with deep treatments, however I more frequently use them to sleep in using the "Baggy Method."


If you haven't heard of baggying before, simply put, it is tucking your hair away under a plastic cap to preserve the moisture as much as possible. The best time to do this in my opinion is overnight when hair is prone to dryness due to cotton pillowcases and scarves, and the friction of rubbing against the fabric. I've found that even when I start with dry hair at night, my hair is damp in the mornings due to condensation (from my body heat). So to take advantage of this, I rub a little olive oil or conditioner over my hair before applying the cap, then tie my silk scarf over the cap. In the morning I just fluff and go!

I've also been practicing filling in my brows. Shapely brows are a great, free accessory for all naturals. Practice makes perfect! Just be sure find a color brow pencil or powder that closely matches your hair color. I'm almost there...thanks to Tdavis for the inspiration :)


Wednesday, December 30, 2009

My Twisting Regimen


Last week I shared this advice with a fellow CurlyNikki reader and she told me today that it is really helping her hair's softness and moisture levels. When anyone asks me what I do to my hair, this is what I tell them...


******************************************************************


It took me a while to figure out how to retain moisture, so don't feel discouraged. It sounds like you have the process right, but you may not have found the products that work well for you. One thing to remember is that oil does not equal moisture... a true moisturizer should be a water-based product such as a conditioner (rinse out or leave-in) or a moisturizing cream. I personally prefer to use conditioners to keep my hair moist for two reasons: They actually absorb into the cuticle of the hair, and they can be "revived" so to speak by adding a little water once it dries.


I never could get the whole "moisturize, then seal" with oil concept down... I would have globs of white crap all in my hair that way. So now I mix my leave-in moisturizer with the oil before I apply it to my hair, so I cut two steps down to one. Wash and go's can be prone to dryness, so doing twist outs help me to retain moisture because your curls are more clumped together, making it harder for air to suck the life out of them... My moisture routine goes a little something like this:


1. Shampoo (only if necessary..when conditioner won't cut through the build-up..and only one lather) Creme of Nature Original Formula for Color Treated Hair


2. Cowash with Herbal Essences Color Me Happy (conditioners for colored hair have more moisturizers...use them regardless to whether you have color or not) ....


3. Fully detangle section by section with the conditioner still in... (I use quite a bit..loosen a section with your fingers..then use a wide tooth..then a fine tooth to make sure all tangles are out)


4. Rinse completely.. (try to keep your hair as straight as possible so you don't re-tangle.. lol)


5. Twist your hair in small sections, applying the leave-in/oil mix to each section (don't just apply it..comb it through to get all the strands coated with it) before twisting. Cantu Shea Soft Leave-in mixed with Extra Virgin Olive Oil (Coconut oil is good for warmer months)


6. Let it air dry overnight (sit under the dryer for no more than 20-30 mins if you need to speed things up)


7. Carefully take each twist down in the morning...slowly..so you don't frizz out the ends. Use your fingers to fluff the roots *only* to cover any spaces you don't want showing.


8. Wear the satin bonnet at night, and spray it in the morning with a little water to soften it up a bit...not soaking wet..just mist all over enough to get your fingers down to the roots to shape it back up. I don't add extra product during the week to keep my hair from getting nasty...just water... remember water equals moisture.The most important step here is mixing the moisturizer with the oil and making sure you coat each strand.


*******************************************************


The pic you see above were the results of this method...Try it and let me know what you think!


Smooches


Tuesday, July 14, 2009

Betonite Clay Mask and Avocado Honey Deep Treatment

As promised here are the details of my natural clarifying and deep conditioning session. I first clarified with betonite clay and used a homemade avocado treatment to moisturize...All I can say is that I am a true believer in natural, kitchentician concoctions doing wonderful things for natural hair. I will outline my steps to each process below. Keep in mind that I have a 4-inch TWA, so adjust amounts as you see fit...you will need more for longer hair.
Betonite Clay Mask

You will need:
  • 3 heaping tablespoons of Betonite Clay (I purchased mine from a natural seller on e-Bay for about $3.75/lb- Lasts FOREVER!)

  • Water (as needed)
Process: In a small mug, I gradually added water and stirred continuously until I had a pretty thick paste. It is nearly impossible to get all of the lumps out, but they smooth into the hair pretty well so don't worry about it. Afterwards, I wet my hair completely but did not use any other products, ie. shampoo or conditioner, and sectioned my hair into fours. Then I started gobbing on the Betonite clay working from front to back until every section was coated, covered with a plastic bag so that it wouldn't dry out, and commenced to doing some housework.


About 30 mins later, I rinsed in the shower, and it rinsed right out for the most part. The plastic bag kept it from drying in my hair, which made it easier. I could immediately feel a difference in my hair; it was softer and I could feel that the curls had a lot more spring and definition. Most importantly, it was CLEAN and it didn't feel dry or stripped. LOVED IT!!


Avocado & Honey Deep Treatment


You will need:
  • One ripe avocado (the skin should give under slight pressure)

  • One tablespoon of honey

  • One tablespoon of oil (I used soybean, but Extra Virgin Coconut or Olive Oil would be best)

Process:
I halved the avocado and removed the pit, scooping all of the pulp into a mug. I added the remaining ingredients and stirred very well to try and get the lumps out, but it was still somewhat lumpy. I sectioned in four and applied all over and covered with a plastic cap. Then I wrapped my hair in a steam towel and covered that with a dry towel to ward off any drips. About 45 mins later I rinsed and noticed a few strands of the avocado pulp were stuck in my hair, so I re-rinsed. There were still a few little white strings hanging on in there, but I didn't care at that point. All I could do was stare at my hair..how clean it was and how nice and smooth it felt from root to tip. I didn't even want to use a leave in, but I know better than that...so I added some HE and oil and rocked a wash-n-go. This will definitely be a once a month session for me.


You ladies should try it and let me know your thoughts on it, too!!

Wednesday, June 24, 2009

Sheer Laziness...

..has kept me from doing a natural clarifying and deep conditioning that is well overdue at this point. I have had the necessary ingredients for some time now, so I really need to just set aside some time and DO IT ALREADY!! I have read that DC's are the life of natural hair and should be done on a weekly basis, so no time like the present to get started.

Tonight, I will be clarifying with a Betonite Clay hair mask and following that up with an Avocado/Honey DC..all made from natural ingredients. I hope to be able to post pics of the process and the results but I let my sister borrow my camera, and of course it was damaged while in her care *sigh* ...so we shall see..


Monday, May 11, 2009

I Need a Regimen...

SO LATELY I'VE BEEN FEELING KINDA LOST...Like I don't know what to do next with my hair. I will say that I have finally managed to wear my hair out everyday for the last week and a half (YAY!). For the first two and a half months after my big chop, I wore my hair in braids or covered it with a wig...not that I was ashamed of my kinky hair, though; I think it had more to do with how SHORT it was. My hair has always been at least shoulder length, and right before my first BC it was between my shoulder blades. So to see it go from there to a 2 inch TWA was a bit of a shock :)

I guess I have "somewhat" of a regimen. I co-wash my hair EVERYDAY...sometimes twice a day, because if I don't it is a matted mess and it gets extremely dry by the end of the day. I co-wash with Pantene "Texturize" conditioner which has a really creamy feel and a clean smell to it. I found a huge bottle on clearance at Target for about $4. Afterwards, I lightly pat out excess water and apply Herbal Essence's Hello Hydration all over as a leave-in. Reading other natural blogs, I know I should be sealing with oil, but I haven't quite figured out how to do this without disturbing the curl pattern as it dries (any suggestions?) and going to work with gooey/white hair. My hair looks fab by the time I get to work...by the end of the day? Not so much....
Sometimes I apply warm water to my hair to "revive" the dried leave-in conditioner..and sleep with a shower cap under my satin bonnet..then wake up and repeat. I will be doing my first deep conditioner this weekend with a Dr. Miracle's Treatment and hope to try my first coil out.. I've noticed that my hair fingercoils really well. Wish me luck! I will post pics afterwards..